
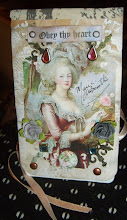
Start with any cardstock - a standard sized card is typically 4 ¼ x 5 ¾", which is made to fit into a standard 4 ½ x 6" envelope. So your paper's flat size should be 8 ½" x 5 ¾" wide. Then, once it's folded, you'll have your finished standard size. However, your card can ultimately be whatever size you'd like it to be, and it doesn't even need to be put inside of an envelope.
Embellishments: in the same fashion as a scrapbook page, you can add your embellishments to the outside and inside of your card. Also, the fun of making your own cards comes from adding different dimension to them - they don't have to always be flat like store-bought cards. By using objects to customize your cards, you can toss the envelope and create cards with lots of layers and dimension.
Additional Embellishments may include rubber stamps, stencils, clip art, bling, lace, ribbon...the list can go on and on. Wherever you find inspiration, whether it is through images or through words, you can certainly find ways to decorate your cards. Using your favorite verse from a poem,quotes or Bible scripture to give your card a peculiar meaning goes along way to the receiver. Use a set of rubber stamps to make a collage, then pencil them in with color, or use clip art to decorate your kid's cards, or you can use photos too. ***Recently, I noticed at many discount stores like Tuesday Mornings, Dollar Tree and even Target's Dollar Spot offer stamps and embellishments and that they often get marked half off within weeks of first appearing.
Gift Sets: Home-made cards are excellent gifts for any occasion. You can apply a series of photos that you took at the local botanical garden and create a set of twelve unique cards. Or for the holidays, you can make someone's life so much easier by giving them a set of twenty of the same card for their Christmas-Card list. (This is a great gift idea for those on a budget but want to stretch their gift giving list just a bit. For those who own cutting machines such as the Cricut, there is a cartridge called Wild Cards and it contains over 50 different card making ideas.) It is never too early to get started on your gift list for weddings, showers, and Christmas gifts.
Showing posts with label Gifts. Show all posts
Showing posts with label Gifts. Show all posts
Saturday, June 5, 2010

Wednesday, February 3, 2010
Disney Valentine Gift Baskets and Items for Teachers


Valentine’s Gift Ideas for Teacher, Friends, Neighbors and Everyone who is Important in Your Life
Each year, we are given a day to express our love, devotion, and care for those who mean something to us and create something unique to them. I enjoy the challenge of creating a sort of artsy craft for teacher, my kid’s friends, and neighbors just to name a few. A few years ago, I made Disney Valentine Bags (the picture is posted on the left hand side of the screen) for my sons and they were a big hit! This year I was feeling a little ambitious and have been very busy trying to create something special for those who teach our children, something besides the obvious.
I bought several bags of mixed candies, Valentine’s paper, Ribbon, Heart shaped baskets, and heart shaped boxes of chocolate, pencils and other items. I individually wrapped most of the items for each gift basket. I needed to make 4 and wanted a little variation given to each teacher.
I took Valentine’s paper and wrapped miniature candy boxes/bags, the Valentine Heart, Magnets that were attached by a pencil and could be easily taken off so the teacher could use the magnet as well as the pencil well after Valentine’s. I took a ton of pictures to give you ideas and to spark just a little creativity to those who care so much for others. It is amazing what you can do with paper, tape, labels, candy….I found a great teacher poem and printed it off and attached them to heavy cardstock; this can also be used as a magnet. I created little sayings that would mean something to those teachers. I asked my kids to ask their teachers what sort of Disney characters they liked, and I got to work using my Cricut Expression cutting machine. I am still working on assembling the baskets and will post within the next few days. These were really time consuming and so far I am really pleased with the items I have made…
Subscribe to:
Posts (Atom)