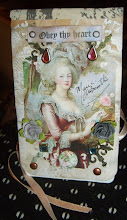
Hopefully, by now, most of you know I love to host and be in swaps. It is enjoyable to help others with their own craft while improving myself. So, I started a 12 Week Christmas Challenge swap and had 2 partners. One of the weeks was to alter a photo album for your partner. I love the way these turned out and I hope that my partners will be able to enjoy these for years to come.
Showing posts with label prima flowers. Show all posts
Thursday, October 7, 2010
Tuesday, September 14, 2010
Magnolia Tilda New Adventures Greeting Card
I just got the news that my dear mother will be going to Real Estate school and that news brought great joy to me. My parents were divorced and I was raised by my mom. She was one of my biggest supporters. I graduated at age 16 from high school and got my Associates in Art at 18. She always encouraged me to achieve the goals that I set for myself. Today I got the inspiration to make her a special card because I couldn’t find something that fit what I wanted to say.
The items I used for the card was:
Blank card
Adhesive ribbon
Magnolia Tilda Stamp
Tim Holtz Journey key
Prima flowers
Brads
Copic markers
Cat’s Eye Chalk ink
Extra ribbon and fiber
Glue Dots
I am truly proud of her and look forward to her success.
Labels:
cat's eye chalk,
Fiber,
foam,
Magnolia Stamps,
Magnolia Tilda,
prima flowers,
ribbon,
tim holtz
Monday, August 30, 2010
Altered Alice In Wonderland Remember Rabbit Photo Album
Recently, I purchased some Vintage-looking Alice in Wonderland Stamps and I wanted to play around with them. I decided to take the Rabbit "You are Invited" stamp and place it onto white cardstock which I cut to size to place where one would normally place a photo. I spray painted some brass brads with silver spray paint. I used some glue dots to adhere the purple cardstock onto the photo album. I glued the "remember" ribbon onto the front of the album. Using a sharp tool, I poked 2 holes on either side of the word "remember" to insert the spray painted brads. I found a little heart charm and glued it with a hot glue gun onto the corner of the rabbit framed area. I used a vintage button and a cloth prima flower and glued it to the corner of the album and used a paper photo corner for the other side. This is one of my favorite altered albums and I think that I gave the Rabbit new life along with the album.
Labels:
Alice in Wonderland,
altered albums,
altered art,
brads,
buttons,
charms,
glue dots,
glue gun,
memories,
photo corners,
prima flowers,
Remember,
ribbon,
stamps,
vintage
Sunday, August 29, 2010
Great Grandma's Childhood Scrapbook Page
A few years ago, I decided to create a special scrapbook for my in-law's 35th Wedding Anniversary. Almost 8 months before the Anniversary, I typed up a letter for family members, friends, and co-workers, to send in copies of pictures they wanted included, letters of memories with my in-laws, grandchildren's artwork, and much more. I got a huge response which ended up in 4 scrapbooks each with about 50 pages. It was a wonderful experience to thumb through the many older photos. My husband's grandma Rita, sent in a picture of her as a little girl. I loved the photo so much that I knew this picture commanded a certain attention to details. I used glittered chipboard for the letters in her name, a scrapbook page from DCWV Once Upon A Time 12"x12" paper stack. I used paper flowers from that line along with some sparkly bling. I used some square brads for her last name. I think this has to be one of my all time favorite scrapbook pages. I not only made this copy for my in-laws, I made one for my own book so that my children could see childhood photos of their great-grandmother.
Labels:
childhood,
chipboard,
Grandma,
Heritage,
memories,
prima flowers,
scrapbooking
Know Where You Are Going 2 Page Scrapbook Map Layout
I purchased a DCWV PhotoMat 12"x12" paper which included all sorts of paper designs. One of the pages was of a vintage looking map of the world. I tore parts of the map to created the 2 page layout. I found paper Kraft photo corners to give the page a little more rustic and aged look. I added some images and flower primas to add some dimension to the pages. I plan on using these 2 pages for my step-dad's Navy Scrapbook.
Labels:
2 page layout,
Heritage,
history,
Map,
memories,
Navy,
photo corners,
prima flowers,
rustic
Only You True Love Scrapbook Page
I enjoy playing around with different color schemes and so I was wanting to do a page with warm winter colors for a Layout (LO). I used some prima flowers, Brads, Pre-printed Words and phrases, distressing inks, bling, photo mats.
Labels:
2 page layout,
bling,
brads,
love,
only you,
prima flowers,
scrapbooking,
true love
Sunday, April 11, 2010
“All That I Am” Embellished Mother’s Day Card Friday Challenge
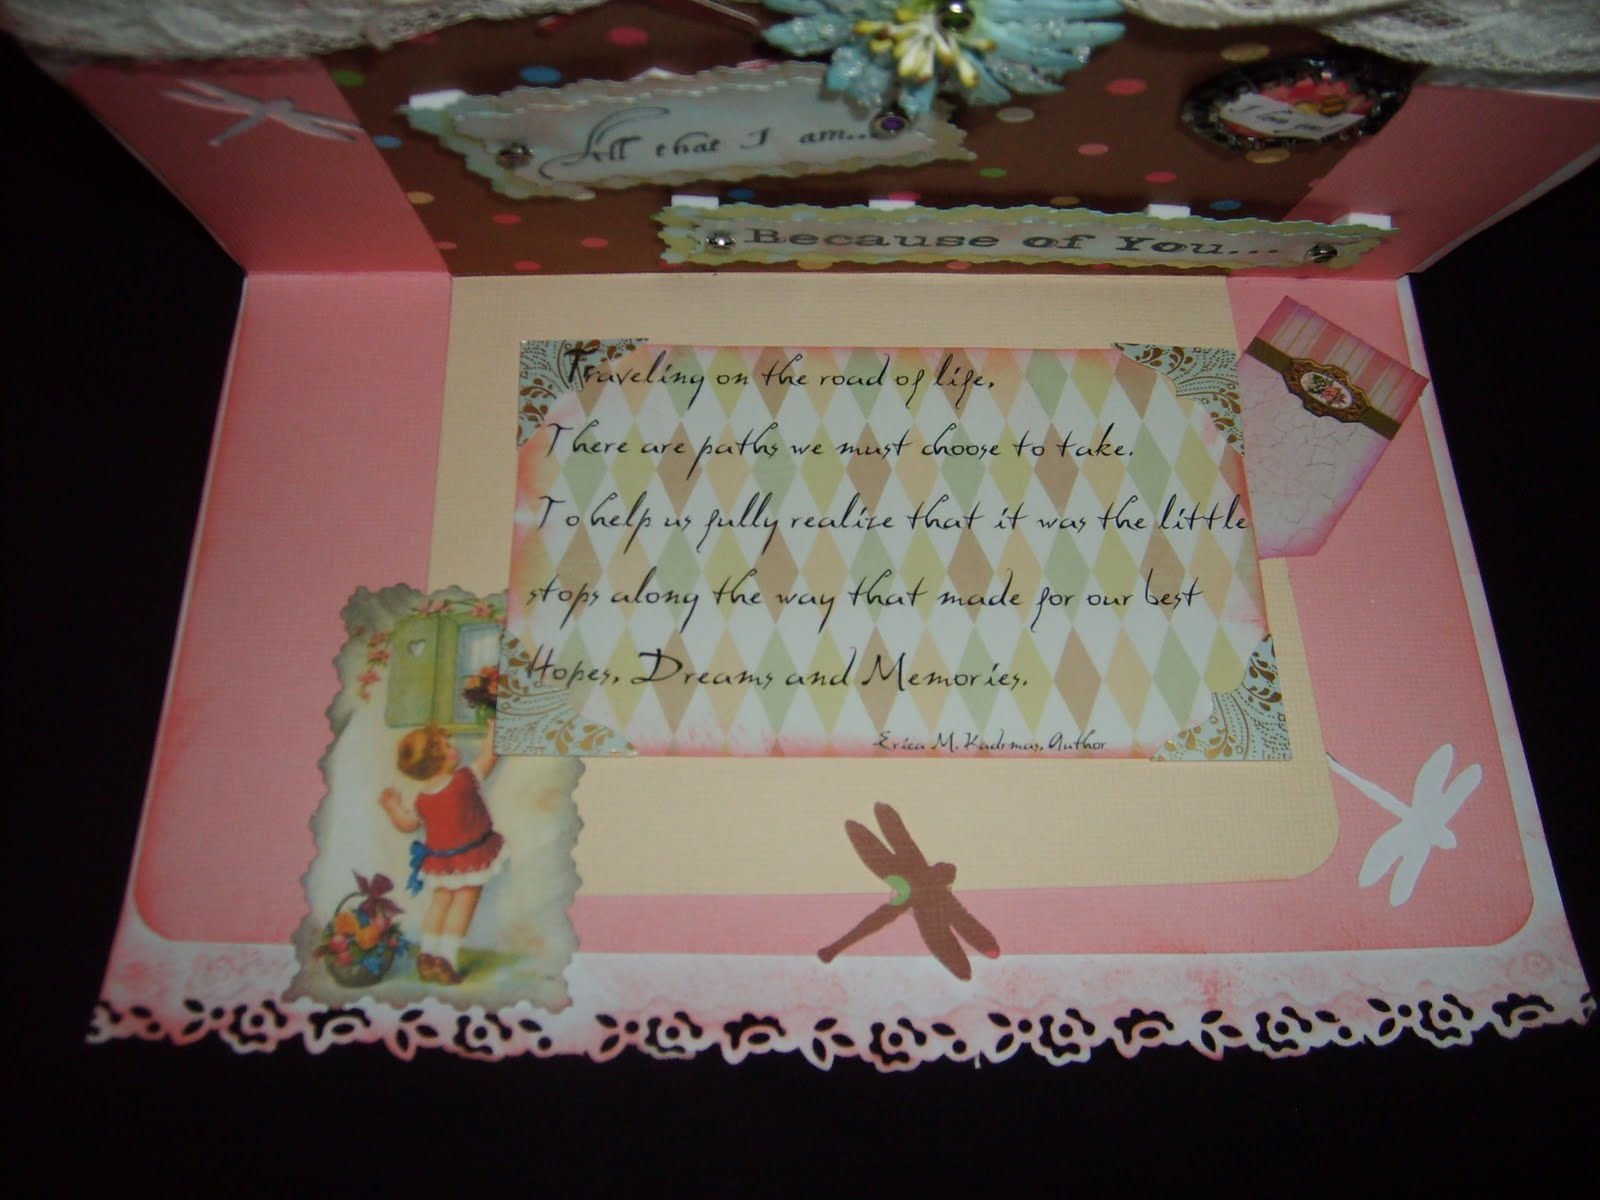
Knowing that Mother’s Day is fast approaching, I knew that I needed to get, make or buy a Mother’s Day card for my beloved Mother. Each year, I stroll down countless aisles of “generic” or “mass-produced” cards to try and find the “right words” that describe my undying and grateful love for my mother. This year I decided that I would make my mother a card that said what I wanted it to say and have her and I weaved and created throughout my card. First, I was stumped on where to begin. My mind had been in a fog for quite some time. Then and idea came to mind and I decided to check out a new blogging website that I have grown quite fond of: Practical Scrappers. There I found a wonderful “Friday Challenge” for the week of April 9, 2010, where one of the Practical Scrappers design team members, Gloria, created a pattern or example to follow.
To find her challenge, click on the following link below.
Practical Scrappers Blog Website
So I dug out my paper, glues, brads, ribbon, charms, chipboard, images and many other embellishments. The front of the card has many layers to give it dimension and add interest to the eye. I love lace and doilies and added them to the front and in the inside of the card. I used bling around the “Happy Mother’s Day” sentiment. More bling in the form of adhesive Pearls were added to the upper right hand of the card. The ribbon lace has been run through a metal brad ribbon holder. I used the Clearsnap Cat’s Eye Chalk Ink throughout the entire card. I used a Martha Stewart Lace Border punch and Fiskars “Icing on the Cake” Embossed and Border Punch. To create the dragonflies, I used the Martha Stewart Dragonfly Punch. I altered a metal bottle cap and before I hammered the edges down, I added a pink diamond pattern paper, with the words “I love you” with a tiny bumble bee which is on the upper portion inside the card. I created my own sentiments for my mom. The sentiments on the upper portion reads: All that I am…; Because of you…
The sentiments in the lower half of the card read:
Traveling on the road of life,
There are paths we must choose to take,
To help us fully realize that it was the little
Stops along the way that made for our best
Hopes, Dreams and Memories.
I wanted the back of the card to be just as special as the rest of its counterparts and so used the dragonfly punch to make 3 dragonflies on the dark red paper. In between the dragonflies, I placed a vintage pink and white button between the spaces. I used a 7 gypsies Romantique label sticker and placed the word “Smile ” on it using double sided tape and mini black brads. I used mini white brads to further secure the label.
A few months ago, I picked up a stamp that I truly loved and it reads:
If you had any idea
How long it took me
To make this card, you
Would never throw it away.
To All Those Dear, Special and Wonderful Women in Our Lives:
Happy Mother's Day!
Friday, April 9, 2010
How to Make an Altered Fairy Gift Tag Instructions:
How the Fairy Tag was made:
- Chipboard
- 1 Peach Colored Piece of Cardstock
- Covered Adhesive Chipboard "F" Letter
- 4 inch Fairy Flower Stamp
- Paper Hole Puncher
- Ruler
- Glue Dots/Adhesive Double-Sided Tape
- Darice Finishing Accents Ribbon/Fibers
- Making Memories Metallic Charm that read: Laugh with 2 rows of 3 bling stones
- 3 Green Feathers
- 2 Prima Flowers- Daisy Mix #716387
- Le Plume Carnival Set Markers
- Crayola Thin Markers
- Clearsnap Cat's Eye Chalk Ink- Various Colors
- 2 Brass Brads
- 6 Pewter Square Brads
- Scissors
- Sharp Tool for Puncturing Holes into the Chipboard
2. Take your hole punch, and punch in the center of the tag.
3. Using the Cat's Eye Chalk Ink to distress the edges on front and back of the tag. I used 4 different colors to give it an aged "feel."
4. Take the wooden Flower Fairy Stamp (I bought mine from Michael's Craft Store), and take the Le Plume Black marker brush side to apply the ink and stamp onto a peach colored piece of cardstock. Let the ink dry.
6. Outline the colored design with the Le Plume Black Marker with the fine tip point.
7. Take the scissors and cut around the taller flower bunch that the Fairy is holding with her hands, and on the left side of image cut around the outer part of the butterfly and lower flower bundle until you reach the edge of the image. Measure the stamped image so that it fits the chipboard tag. Make sure there is no overhang of the image on the tag.
8. Take the purple fiber ribbon and measure enough of the ribbon to fit across the front of the tag, and allow about an inch on either side. Use mini glue dots to adhere the ribbon to the front of the stamped image. Turn the paper tag over and use a piece of tape to hold the remaining ribbon to firmly secure it into place.
9. Take the 3 feathers and tie the ends of each feather together with a piece of tape. Take another piece of tape to secure the feathers to the chipboard tag.
10. Take the stamped paper tag and put double sided tape around the entire perimeter of the tag, and a piece in the middle of the tag. Secure the tag to the chipboard. Note: There will be a little lift on the paper because of the feathers. This is alright because you will be "disguising" the lift with the Prima Flowers.
11. Using your sharp tool, puncture each corner, and above the cut butterfly image, and one near the little flower bunch on the left side (the 2 brads will be somewhat close) of the stamped chipboard tag making the hole wide enough to put brads through. Place a Pewter Square Brad in each hole.
12. Take the brass brads and insert it into the center of the prima flowers. Using your sharp tool, puncture a hole about 1/2 inch from the left side and place the larger prima flower with the brad into it and close it. Just a few centimeters below the first prima flower hole, place another hole so that you can put the second Prima brad flower.
12. Remove the paper on the back of the adhesive chipboard letter "F" and place it under the 2 flowers. I used the letter "F" for 2 reasons: Flowers, and Fairies.
13. Use a large raised Glue Dot and place it on the back of the metallic "Laugh" charm. Place the charm near the bottom in the middle of the chipboard tag. Your charm will cover some of the fiber, but that is what adds to the charm.
14. Take, at least, 2 different but complimentary ribbon and fibers and run it through and over to secure the ribbon to the tag. Tie the ends of the ribbon into a knot to prevent fraying.
15. Enjoy your new work of art! Place on a gift, or just hang it on the wall for a piece of art.
Labels:
altered,
altered art,
bling,
brads,
cat's eye chalk,
chipboard,
distressed,
Fairies,
Fairy,
Feathers,
Gift Tag,
glue dots,
ink,
Laugh,
le plume,
markers,
prima flowers,
stamps,
tags
Practical Scrappers Marker Challenge Contest: Erica's Altered Chipboard Fairy Tag Using Markers!!!
Altered Art "Laughing Fairy" Gift Tag
April is such a wonderful month that is filled with all sorts of secret and beautiful new beginnings. Many flowers are blooming, and people are emerging from their homes to enjoy the beautiful weather. Last week, I was bored so I thought to myself "Self, you need a challenge." So, my "Self" went online to see what other artists were creating. I stumbled across a wonderful blog site for "Practical Scrappers" that is filled with challenges, contests, tips and much more. For those who are on limited means, want to use what you have, find new uses for long forgotten items, then this is the site for you. When I was first introduced to scrapbooking, I bought anything and everything I thought I needed. I ended up using maybe 1/3 of the items, and the "leftovers" lurk in the darkest corners of my studio hoping to get its fifteen minutes of fame (or forever be remembered in a card or scrapbook page). The "Practical Scrappers" are so creative, and inspire one to learn new techniques and try new things while using what you have. You can find them by clicking on the link below:
Practical Scrappers Blog Website
So, after viewing all of the wonderful projects on this board, I felt like the inspiration bug was coming to visit. It had been awhile since he was last here, so he was a welcomed sight.
The weekly challenge was to use: Markers. Yes, you read right; just good old fashioned markers. Most crafters, parents, kids, grandparents or basically anyone who is alive has these great colored ink holders. I am unsure of who was the original creator of "The Marker" but I do know that he/she was a pure creative genius! The task and challenge was to bring out our long-forgotten items and put them to use in creative ways. So, throughout this past week, I ended up making all sorts of things like: cards, paper bag books, shaker boxes, but my final project was an "Altered Stamped Fairy Gift Tag." I am so proud of this tag, and I hope you enjoy it also. I may get the nerve to post my other creations designed with markers but for now, this is my winning entry.
To create your own Fairy Tag, I have posted the instructions. Enjoy!
Practical Scrappers Blog Website
So, after viewing all of the wonderful projects on this board, I felt like the inspiration bug was coming to visit. It had been awhile since he was last here, so he was a welcomed sight.
The weekly challenge was to use: Markers. Yes, you read right; just good old fashioned markers. Most crafters, parents, kids, grandparents or basically anyone who is alive has these great colored ink holders. I am unsure of who was the original creator of "The Marker" but I do know that he/she was a pure creative genius! The task and challenge was to bring out our long-forgotten items and put them to use in creative ways. So, throughout this past week, I ended up making all sorts of things like: cards, paper bag books, shaker boxes, but my final project was an "Altered Stamped Fairy Gift Tag." I am so proud of this tag, and I hope you enjoy it also. I may get the nerve to post my other creations designed with markers but for now, this is my winning entry.
To create your own Fairy Tag, I have posted the instructions. Enjoy!
Tuesday, March 23, 2010
All Kinds of Handmade One-of-a-Kind All Occasion Cards (Birthday, Anniversary,New Baby, Wedding, get-well, Cancer, & others
Before I started doing scrapbooking, I enjoyed making cards. Sometimes it is just plain hard to find that "perfect" card for that "special person and occasion." My solution was to make a card to fit the occasion and the reciever of the card. I used all sorts of techniques for the cards and used a variety of glues, foam, distressed, added charms, well, let's just say if the card making technique is out there, then I most likely have made it. The following cards are just a small sampling of what sort of cards I have made. The card with the tree is a magnet and there is a quote underneath.There are a few that I have made for those who have had cancer and the people I have given them to have told me that it was such a blessing a spirit lifter for them. I have a rubber stamp that says: If you knew how long it took me to make this card, you'd never throw it out. So, here we go:
Labels:
anniversary,
Artist Trading Cards,
birthday,
Chinese,
death,
Easter,
halloween,
just because,
miss you,
photo books,
prima flowers,
sympathy
Shabby Chic Altered Prima Rose Notebook
Shabby Chic Altered Rose Notebook
I use notebooks all of the time, but was never able to find one that was truly unique. I took a yellow lined paper pad about 5 inches by 7 inches that I found at Wal-Mart. I then took a glue gun to attach a yellow cardstock to the front and partially in the back. I used an Anna Griffin paper and cut it to size. I used a Fiskars “Icing on the Cake” border punch around the edges. I took a paper flower called a prima and a brad to make the notebook special. Then I used double sided tape to adhere the floral paper to the yellow cardstock. These make great last minute gifts to give to that person who has everything. I have a special notebook that matches each of my purses so I can coordinate my accessories even if I don’t match my clothing.
Labels:
altered,
altered albums,
anna griffin,
notebook,
prima flowers,
shabby chic
Friday, March 19, 2010
Beautiful Handmade Cards and Prima Inspriration Easter Paint Can
During a recent Easter Paint can swap, I had two partners who created some of the most beautiful items, cards, cans and blessed me with so many scrapbooking, crafting items. I recieved 3 of the most beautiful handmade cards that have so much detail, ribbon, bling and embossed paper, and much more. I think the cards and the Paint can were my most favorite from my wonderful partner -*Kristina*-.
Here are some various angles of the Paint can and all of the wonderful goodies inside:
Another surprise in the package was the most adorable "cupcake" towel holder wrapped with purple mesh type materials. Kristina is so talented. These would make wonderful hostess gifts, bridal shower gifts, wedding gifts, parties and much more. It is so beautiful I don't have the heart to use it at the moment.
Vintage Inspired Custom Tags and Easter Paint Can
I was recently in a Easter Paint Can swap, and recieved some of the most beautiful and wonderful items. One of my partners created these 4 beautiful tags which I think are some of my most favorite in the entire package. I would like to pay homage and respect to this wonderful artist, her Message board name is Scrappin_RN on the Cricut board. All 4 tags have been distressed, inked, and given their own personality. There are prima flowers on 2 of the tags along with brads. One o the tags has the word Memories done in glitter, and it is so beautiful. The other tag with the prima flower has the simple but wonderful quote: Life is Sweet. The thrid tag has been distressed and has the words: Live, Laugh, Love. Last but not least, is a beautiful vintage looking sunflower tag. These are so beautiful that instead of hiding them away, I am planning on matting and framing them. She also made me one of the most beautiful paint cans decorated with the letter E on the lid. The box was overflowing with scrapbooking, crafting supplies. I heard about a designer called Tim Holtz, but did not own anything of his until now. I totally love those products, chipboard, stamps and others. Next time you go to your local scrapbooking store, check out the Tim Holtz line, you won't be disappointed. Below, are the photos of various angles of the can and the contents inside. Enjoy! Thank you so much Scrappin_RN for such a beautiful and wonderful gift. It was such a wonderful spirit lifter!
Labels:
altered art,
bling,
brads,
chipboard,
Easter,
Paint Can,
prima flowers,
shabby chic,
stamps,
stickers,
stickles,
tags,
tim holtz,
vintage
Thursday, February 4, 2010
2nd Inchie Black and Pink
Subscribe to:
Posts (Atom)