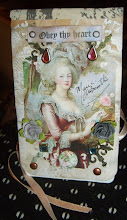
Start with any cardstock - a standard sized card is typically 4 ¼ x 5 ¾", which is made to fit into a standard 4 ½ x 6" envelope. So your paper's flat size should be 8 ½" x 5 ¾" wide. Then, once it's folded, you'll have your finished standard size. However, your card can ultimately be whatever size you'd like it to be, and it doesn't even need to be put inside of an envelope.
Embellishments: in the same fashion as a scrapbook page, you can add your embellishments to the outside and inside of your card. Also, the fun of making your own cards comes from adding different dimension to them - they don't have to always be flat like store-bought cards. By using objects to customize your cards, you can toss the envelope and create cards with lots of layers and dimension.
Additional Embellishments may include rubber stamps, stencils, clip art, bling, lace, ribbon...the list can go on and on. Wherever you find inspiration, whether it is through images or through words, you can certainly find ways to decorate your cards. Using your favorite verse from a poem,quotes or Bible scripture to give your card a peculiar meaning goes along way to the receiver. Use a set of rubber stamps to make a collage, then pencil them in with color, or use clip art to decorate your kid's cards, or you can use photos too. ***Recently, I noticed at many discount stores like Tuesday Mornings, Dollar Tree and even Target's Dollar Spot offer stamps and embellishments and that they often get marked half off within weeks of first appearing.
Gift Sets: Home-made cards are excellent gifts for any occasion. You can apply a series of photos that you took at the local botanical garden and create a set of twelve unique cards. Or for the holidays, you can make someone's life so much easier by giving them a set of twenty of the same card for their Christmas-Card list. (This is a great gift idea for those on a budget but want to stretch their gift giving list just a bit. For those who own cutting machines such as the Cricut, there is a cartridge called Wild Cards and it contains over 50 different card making ideas.) It is never too early to get started on your gift list for weddings, showers, and Christmas gifts.